In this blog we're going to look at how to write chatbots for Skype for Business Persistent Chat (PChat) through the Microsoft APIS and the MindLink API. Aside from your chatbot's business and AI logic, as a developer, typically your first concern is how to connect your chatbot to the chat system.
We'll compare and contrast two different ways of writing chatbots for PChat - the Microsoft SDK route, or using MindLink API. As with everything, let's just try making a bot that posts "Hello World" into a chat room.
Microsoft APIs
So first let's see how this is done using the Microsoft SDKs. Microsoft's Persistent Chat Server SDK (PChat SDK) is the only way of integrating chatbots into PChat rooms. Some things to note:
- This is a .NET SDK (so we're limited to .NET programming languages - we'll use C# in this sample)
- This SDK depends on Microsoft's "Unified Communications Managed API" (UCMA), so we'll need to use that too
Pre-requisites
First things first, our bot needs an identity on the underlying chat system. The Skype administrator needs to provision a Trusted Application registration on the Skype infrastructure for our bot. This will let our bot connect, but also gives our bot god-like rights on the system, so we'd better be sure our bot works correctly.
The Trusted Application registration is *per-machine* so we need to do this for every environment where our bot will run - dev vs staging vs production etc. The Trusted Application connection mechanism uses a two-way mutual TLS connection, so the machine hosting the bot needs an open port on which it can listen for connections. We need to provide this port as a parameter when registering the trusted application.
Developer Set Up
Both the UCMA and PChat SDKs are distributed by Microsoft as globally-installed dependencies, so first thing we need to do is install these. This means the .NET libraries are available for us to reference from the Global Assembly Cache.


Note that this means that these dependencies will also need to be globally-installed in any environment where our bot is deployed.
We'll also need a certificate issued to the local machine, so that this machine can authenticate as the trusted application to Skype. We can typically request this from the internal certificate authority. Again, this needs to be done for every machine our bot can run on.
We also need to ensure that the port we're going to listen on for mutual TLS connections is open - again, for every machine the bot will run on.
Project Set Up
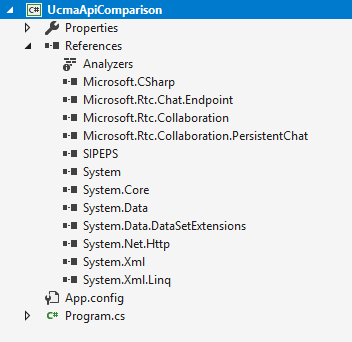
We'll create a new .NET Framework console app and reference the UCMA and PChat libraries
App Initialization
Now for some coding. The first thing we need to do is set up our app and initialize the Microsoft SDKs. In UCMA parlance, this involves configuring the "collaboration platform" - this basically means we have to configure the local environment to be trusted by the Skype for Business infrastructure. This means we have to initialize the collaboration platform with our certificate, and our trusted port.
var certificate = new X509Store(StoreName.My, StoreLocation.LocalMachine).Certificates.Find(X509FindType.FindBySubjectName, "mymachine.domain.com", true)[0];
var serverPlatformSettings = new ServerPlatformSettings("My Bot User Agent", "mymachine.domain.com", 4096, string.Empty, certificate);
var collaborationPlatform = new CollaborationPlatform(serverPlatformSettings);
collaborationPlatform.EndStartup(collaborationPlatform.BeginStartup(null, null));
At this point - just a note on threading. Everything in UCMA and the PChat SDK is asynchronous (generally a good thing). Unfortunately, the API using the archaic and verbose Begin/End asynchronous pattern, which generally just makes things even more confusing than it already is. For the purposes of this, we'll ignore this and just use the End(Begin) pattern for simplicity.
Similarly, we'll omit any exception handling from this sample. UCMA has a thorough and complex exception model - every UCMA method call can throw multiple exception types that should be handled in different ways.
Logging On
Next we need to actually log our bot on. This means we'll have to create an "endpoint" for the bot, and establish that endpoint against the Skype frontend servers.
var applicationEndpointSettings = new ApplicationEndpointSettings("sip:testbot@mindlinksoft.com");
var applicationEndpoint = new ApplicationEndpoint(collaborationPlatform, applicationEndpointSettings);
applicationEndpoint.EndEstablish(applicationEndpoint.BeginEstablish(null, null));
Our bot is now connected to Skype! But unfortunately that's only half the story - we're connected to the Skype frontends, but we're not connected to the PChat servers.
Time to use the PChat SDK. This is a layer on top of the UCMA constructs above. Again, we'll need to use the "endpoint" paradigm to connect to the PChat pool - this time using a PersistentChatEndpoint object from the PChat SDK.
var persistentChatEndpoint =new PersistentChatEndpoint(new Uri("ocschat@mindlinksoft.com"), applicationEndpoint);
persistentChatEndpoint.EndEstablish(persistentChatEndpoint.BeginEstablish(null, null));
So we're now connected to all the relevant bits of the Skype estate. The next problem is what happens when something goes wrong. Chatbots are typically long-running applications, so they need to be able to handle and recover from failures in the underlying chat system. The interesting thing here is we're actually connected to multiple parts of the Skype estate - the frontend tier and the Persistent Chat tier. Failures in any of these server components or network hops will interupt our bot's connectivity. We need to code around each layer of these failures and make sure the bot recovers connection gracefully.
How to do this reliably is way outside the scope of this blog: Each UCMA component as a nuanced (and barely documented) state machine lifecycle that your code needs to understand. Add to this the asynchronous and multi-threaded nature of the UCMA and PChat SDKs, and we're in for a whole lot of extra edge-case code.
Joining the Chat Room
Now let's join a chat room. We'll use a ChatRoomSession construct from the PChat SDK, and we'll need to know the chat room's URI.
var chatRoomSession = new ChatRoomSession(persistentChatEndpoint);
chatRoomSession.EndJoin(chatRoomSession.BeginJoin(new Uri("ma-chan://mindlinksoft.com/0187922d-81e1-40ba-8a07-ad366a170acd"), null, null));
We're now joined to the room. Again, this is another layer of connection lifecycle that can fail. So our bot code needs to manage the failure/reconnection state machine of this entity as well as the two endpoints.
Sending a Message
We can now finally send a message!
chatRoomSession.EndSendChatMessage(chatRoomSession.BeginSendChatMessage("hello world", null, null));
The above is a very simple text message - try to send anything more complex (including links, files etc.) and you'll need to move away from plain text as your message format. The Skype for Business Client only understands messages encoded as RTF documents as first-class rich messages. Coding chatbot messages as compatible RTF documents is several blog posts in itself.
UCMA/PChat SDK Conclusions
Summing up what we've had to do here:
- Configure our Skype topology to give maximum permissions to apps on all machines involved in the bot development and deployment lifecycle
- Install two .NET SDKs as our global dependencies on our development machine, and all machines on which the bot will be deployed
- Prepare bi-directional ports, and certificates for all machines
- Set up a .NET project (no other languages possible)
- Configure the "collaboration platform" with ports and certificates
- Create and manage a connection to the Skype frontend tier
- Create and manage a connection to the Skype PChat tier
- Create and manage a connection to a PChat chat room
- Send a message
What we've omitted for brevity:
- Configuration of all environment variables - connection settings, certificates, ports etc.
- Asynchronous coding using Begin/End
- Exception handling
- Handling and recovery from failures at the frontend endpoint/PChat endpoint/chat room session layers
MindLink API
Now let's see how to do the above, but using the MindLink API.
The MindLink API is a REST-like HTTP API, so first thing to note is that we can write out chatbot in pretty much any programming language. For the sake of contrasting with the previous sample, we'll stick with C#.
Pre-requisites
The MindLink API architecture pushes most of the system administration away from the chatbot, behind the API tier. The API administrator will provide the bot developer with the credentials with which to authenticate against the API.
Developer Set Up
We'll just be making vanilla HTTP calls to the API, so there are no developer set up steps that need to be taken.
Project Set Up
We just need a vanilla .NET project with no additional library references. We can even use .NET Core for cross-platform development, since we'll just be making HTTP calls.
App Initialization
To interface with the API, we'll use the .NET HttpClient API
var httpClient = new HttpClient();
Authenticating
This is where the MindLink API model strays from UCMA development. The chatbot's connection to the underlying system is managed entirely by the API. The API administrator will already have provisioned the chatbots API account, and the chatbot will already be connected to the chat system. All aspects of connectivity, trust and failure/reconnection are handled for you by the API.
All we need to do here is obtain a token with which we can interact with the bot.
var token = httpClient.PostAsync(
"https://mlapi.domain.com/Authentication/V1/Tokens",new StringContent(@"{""Username"": ""domain\\apiuser"", ""Password"": ""Password1"", ""AgentId"": ""myagent""}", Encoding.UTF8, "application/json")).Result.Content.ReadAsStringAsync().Result.Trim('"');
We can then set that to be passed with every subsequent request:
httpClient.DefaultRequestHeaders.Authorization = new AuthenticationHeaderValue("FCF", token);
Sending a message
Now that we have a token, we can start interacting on behalf of the agent. Note that the agent is already ready and joined to the chat room - the administrator has taken care of this for us, and the MindLink API is managing that connection/failures/reconnection lifecycle for us.
So we can go ahead and post a message.
httpClient.PostAsync(
"https://mlapi.domain.com/Collaboration/V1/Channels/chat-room:43489ecf-0d8a-48ec-9d00-0eb9264a07fa/Messages",
new StringContent(@"{""IsAlert"": false, ""Text"": ""Test message""}", Encoding.UTF8, "application/json")).Wait();
And that's it - the API tier is taking care of everything else for us.
MindLink API Conclusions
Summing up what we've had to do here:
- Ask our API admin for our agent credentials - the heavy lifting around installation and configuration of the trust with Skype was done once up front when the API was installed
- Set up a .NET project (but actually we can pick any programming language)
- Fetch a token using our agent credentials
- Post a message
Comparing
We've demonstrated the power of the MindLink API here - as a developer, you can spend time coding the actual business and AI logic of your chatbot. You don't need to worry about the intricacies of Skype trusted applications, or write tons of lines of boilerplate connection management code.
In fact, integration with PChat can be wired up into any application going, in any programming language, with minimum cost and cognitive overhead.
What's next?
- Read more about MindLink Chatbots
- Download the MindLink Chatbots datasheet
- Sign up for a free trial of our API
Want to know more about our products? We also offer:
- MindLink Anywhere: A feature enhanced, Skype for Business Web Client for secure web access.
- MindLink Mobile: A secure and containerised Skype for Business Mobile Client, that supports Persistent Chat.